Friday, November 20, 2009

The Apple of My Pie

I have not been making apple pie very long, but I have learned a lot in the time I have been baking it. In fact, next week will probably break my record of "most pie made in one time" by a long shot. Em and I are traveling back to Connecticut to have Thanksgiving with her parents, a somewhat annual tradition. This means a lot of pie. Apple, first and foremost. John (Em's dad) makes some of the best apple pie this world has ever seen, and I'm willing to put money on that. He makes pie for pretty much any occasion, because, hey, who doesn’t like pie?

Apple pie is really to separate entities, the crust and the filling. For the crust, I have become a huge fan of the Cook's Illustrated "add vodka" pie crust. As a scientist this greatly appeals to me. Water in crust causes gluten formation, which leads to a chewy and not pleasant crust. Well, vodka is only 40% water, so by adding this in addition to water you are under-hydrating the dough, allowing for an easier roll out. When the pie bakes (for quite some time), about 95-98% of the alcohol will burn off, leaving you with a wonderfully flaky crust. Also, as I previously stated in a post, using lard or shortening is important. Its fat structure allows for a better crust, where butter brings mostly flavor. Don't be afraid! I did back down a little on the fat because I feel it makes the pie slightly greasy, but not much.

For the filling, make sure to acquire a good type of apple. Granny Smith, Northern Spy, or Golden Delicious are all very good pie apples. Try to cut them into uniform slices to allow for even baking. And eat some of it. This will tell you how much sugar you will need to add (I have learned that making apple pie is really more of an art than a recipe). John and I differ slightly in our method of preparing the filling. I like to mix the apples with the sugar mixture before placing them in the crust (I feel it makes the pie more evenly distributed), he prefers to layer the apples and sprinkle the sugar mixture as he goes. Either way is good.

Crust

2 1/2 cups (12 1/2 ounces) unbleached all-purpose flour
1 teaspoon salt
2 tablespoons sugar
½ cup (1 stick) cold unsalted butter, cut into 1/4-inch slices
2/3 cup cold lard or vegetable shortening, cut into 4 pieces
1/4 cup cold vodka
1/4 cup cold water

Add 1 1/2 cups flour, salt, and sugar in food processor until combined, about 2 one-second pulses. Add butter and shortening and process until homogeneous dough just starts to collect in uneven clumps, 15 seconds. Scrape bowl with rubber spatula and redistribute dough evenly around processor blade. Add remaining cup flour and pulse until mixture is evenly distributed around bowl and mass of dough has been broken up, 4 to 6 quick pulses. Empty mixture into medium bowl.

Sprinkle vodka and water over mixture. Using a spatula to mix, fold dough by pressing down on dough until slightly tacky and sticks together. Divide dough into two roughly even balls and flatten each into 4-inch disk. Wrap each in plastic wrap and refrigerate at least 45 minutes or up to 2 days.

Filling

6-8 apples (Northern Spy, Golden Delicious, Granny Smith, or a mix), approximately 3-4 pounds
2/3-2/4 cup sugar (depending on sweetness of apples)
Pinch of salt
2 tablespoons flour
1 teaspoon cinnamon
1/8 teaspoon nutmeg
1/8 teaspoon allspice
2 tablespoons butter, cut into small pieces
2 tablespoons cream or milk
Additional sugar or cinnamon sugar for sprinkling

Preheat oven to 425°F and arrange rack to lower part of the oven.

Peel and core apples. Slice into even slices approximately ¼ inch thick. Place apples in a large bowl with enough water to cover and about 2 tablespoons lemon juice (prevents browning). In a small bowl, mix together the sugar, salt, flour, cinnamon, nutmeg, and allspice. Drain apples well (I recommend patting them dry with a kitchen towel) and transfer to a large bowl. Add sugar mixture and coat apples well.

Roll out one pie crust disk on a lightly floured surface and arrange in a 9 inch pie dish. Arrange apples in circular layers, mounding slightly more in the middle. (Alternatively, layer apples with the sugar mixture if you don’t want to mix it ahead of time.)

Dot the butter on the top of the apples. Roll out the other crust, making it slightly larger than the first (you want a little bit of overhang). Brush the edges of the bottom crust with milk (helps adhesion). Fold the top crust in half and make two small cuts for vents. Arrange top crust over pie. Using a paring knife, cut the excess crust so that about ½-1 inch is left hanging below the lip of the pie. Using your thumb, pinch together the edges of the dough, sealing the bottom and top crust. Tuck the crimped edges back underneath the crust (essentially rolling it into itself so it is even with the pan edge) and flute with fingers or fork. This gives you that pretty pie crust look.

Brush the top with milk or cream (I find egg causes too much browning, but you can use egg white). Sprinkle sugar or cinnamon sugar over top

Bake for 50 minutes or until the pie is deep golden brown and the apples are bubbling (might have to go a few extra minutes). Let cool for 3-4 hours before slicing.

Read more...

Wednesday, November 18, 2009

Ta-Molly Pie

Did I alter the title of a dish just to put another picture of my dog on my blog? You betcha. This has become Em's new favorite dish, causing me to refine the recipe rather quickly as well as get my cooking time for an hour total. Tamale's are something I have a deep, deep fondness for. I remember getting from people selling out of their car on the weekends. I would bring home tamales, tortillas, make some beans, and that would be dinner. For anyone who would find this odd, I never got sick, and they were always delicious. Think of it this way, if the guy who sold me that food did make people sick, no one would buy his wares and he would not be selling (word travels fast). I miss food opportunities like this, I feel our society frowns upon the homemade and homegrown unless strictly regulated. Back to tamales. I do not have time to make tamales themselves, but I can make a pie. With tamale ingredients. I tested out the Cook's Illustrated version, and made some improvements (in my eyes). It’s a great dish to feed a crowd, and works nicely with turkey or vegetarian (just add rice or more beans).

Tamale Pie

1 pound lean ground beef
1 onion, diced
2 garlic cloves, minced
2 jalapenos, minced
2 tablespoons ancho chile powder
1 teaspoon dried oregano
½ teaspoon cumin
1 15oz can black beans, drained and rinsed
1 cup corn, frozen or fresh
1 15oz can diced tomatoes, with juice
4 ounces cheese (Colby jack or Monterey jack)
¾ cup coarse corn meal
2 1/2 cups water
1 ½ tablespoons vegetable oil
1 teaspoon smoked paprika
Salt
Pepper

Preheat oven to 375°F.

In a large skillet over medium heat, add beef, breaking up and cooking until browned. Add the onion and some salt, cooking until the onion is softened. Add the jalapeno and garlic, cook for 1 minute. Add the chile powder, oregano, cumin, beans, corn, and tomatoes into the skillet. Cook until most of the juices from the tomatoes have evaporated and the mixture is slightly thickened. Season and remove from heat.

Meanwhile, heat water in a pot until boiling. Stir in cornmeal, reduce heat to low, and whisk until thickened, about 1 minute. Stir in oil and paprika, season with salt and pepper.
Stir cheese into meat mixture. Transfer to a 9x13 baking pan or similar vessel. Top with cornmeal mixture, spreading to the edges to seal. Cover with foil and bake for 30 minutes. Remove foil and turn on broiler to high. Continue cooking until cornmeal is set and slightly browned. Let cool for 10 minutes. Serve.

Read more...

Thursday, November 12, 2009

Peanut Butter Banana Pancakes

After the success of my banana pancakes, I decided to twist it a little bit by incorporating my favorite banana accompaniment, peanut butter. Honestly, if scientists could make a banana with a slight peanut butter flavor, I'm thinking it would solve 95% of potassium deficiency in the world. Well, I can dream, right? Same process pretty much as before. Since I was adding peanut butter, I removed some of the butter to compensate for that. I also found out I could probably eat my weight in these.
Peanut Butter Banana Pancakes

1 cup flour
1 teaspoon baking powder
1/2 teaspoon baking soda
1/2 teaspoon salt
2 tablespoons sugar
½ teaspoon vanilla
1 egg
1 tablespoon butter, melted and cooled slightly
3 tablespoons creamy peanut butter
1 cup buttermilk
1 banana, mashed
2 bananas, sliced thin

Combine flour, baking powder, baking soda, sugar, and salt in a large bowl. Stir until combined. In a separate bowl combine the egg, buttermilk, vanilla, mashed banana, peanut butter, and butter. Slowly add the wet to the dry and fold using a spatula. Once most of the batter is combined and a few lumps remain, set bowl aside and let rest for 5-10 minutes. If the batter is too thick, add a bit more buttermilk. Batter should be slightly thin but not pourable.

Preheat your griddle or pan to medium-high. Spray with a small amount of cooking spray or butter. Using a scoop or ladle, add small amount of batter to pan. Place sliced bananas in a single layer on the top of each pancake. Cook for 3-4 minutes until bottoms are browned. Flip pancakes over and continue to cook until bottom is browned and pancake is firm, about 2 more minutes. Serve with syrup.

Read more...

Wednesday, November 4, 2009

The Great Chili Cookoff Part II: The Showdown

The showdown is upon me! Or rather, it was. The chili cookoff went down at work today. It was lots of fun and I ate way too much.

My chili recipe went through a few more iterations before I settled on a final version. I now have both a quick and easy version, as well as a deep delicious flavor version. For whatever reason, the grocery stores have apparently heard my plea and now carry Anaheim/Hatch chiles in the produce section. Nice!
When shopping for a lot of the ingredients in this dish, I paid a bit of attention to the price when shopping. I bought most of this stuff at a Mexican grocer, and then compared that to what my local meg-mart had to offer. As I thought, a grocer that specializes in a region is WAY cheaper than what the big store are offering, and the quality is much better. Case in point: tomatillos are 99 cents a pound at a Mexican grocery, they are usually $3 per pound at the store. So shop smart (shop S-Mart!!)
In the end, my chili came out much to my (and my coworkers) liking. I placed second, raising $84 in my jar for charity. Which is awesome! The organizer of the event placed first, so yeah, maybe I'm a little competative. That's ok. I hope you enjoy the recipe.
Southwestern White Chili

2 tablespoons olive oil
1 pound ground turkey (at least 90/10, I like 95/5)
1 onion, diced fine
4 cloves garlic, diced
2 chipotle peppers in their adobo sauce, diced
8 oz green chiles, stems removed
1-2 jalapeno's, stems removed
1 10oz can green enchilada sauce
1 pound fresh tomatillos, husks and stems removed
1 jalapeno
1/4 cup cilantro
1 teaspoon sugar
1 cup dry pearled barley
4 cups chicken stock
1 15oz. can cannellini bean beans, rinsed
1/2 tablespoon cumin
1 tablespoon chili powder (go for the Ancho kind, its smokey)
Salt
Pepper
1 tablespoon cornmeal
1 tablespoon tomato paste
Sour cream

Heat broiler to high. Toss tomatillos, jalapenos, and green chiles in 1 tablespoon olive oil. Arrange tomatillos (stem side down) on a foil lined baking sheet along with jalapeno and green chiles. Place in middle of oven, roast for 5-8 minutes or until slightly charred. Flip and continue to roast until charred on other side. Remove from oven can cool slightly. Peel and seed jalapeno and chiles, remove stem part from tomatillo. Place tomatillos, chiles, jalapeno, cilantro, sugar, green enchilada sauce, and some salt in pepper in a food processor. Pulse until mostly smooth.

Heat about olive oil over medium heat in a large pot. Add onion and cook until slightly wilted, about 3-5 minutes. Add garlic and cook one minute longer. Add turkey, breaking it apart and cooking until it has lost its pink color. Add the chipotles, cumin, chili powder, and some salt and pepper. Stir and cook for about 1 minute. Add the tomatillo mixture, cook for 5 minutes, then add the pearled barley, followed by chicken stock. Stir, bring to a boil and lower heat to a simmer. Cover and simmer for about 30 minutes. Add beans and cook 10 more minutes, or until barley becomes only slightly chewy. Remove lid, stir in cornmeal and tomato paste, and cook for about 5 more minutes. Serve topped with a bit of sour cream.

-To simplify the recipe, replace the tomatillos, jalapeno, cilantro, sugar, and green chiles with-

2 4 oz. cans diced green chiles
1 can tomatillos, drained and chopped

Add these ingredients, along with the enchilada sauce, directly to the chili. The depth of flavor will lessen, but it really speeds up the prep time.

Read more...

Sunday, October 25, 2009

Chicken Provencal (In a slow cooker)

A combination of writer's block, an FDA inspection, and my lack of inspiration at the moment (thanks crazy weather) has decreased my output on the blog lately. Sorry about that. But apologies get me nowhere if I cannot produce some food!

I enjoy my slow cooker. I love beef stroganoff and slow cooked beans are consistently a favorite. However, leaving something to heat all day is not always a good idea in the summer months. Thanks to a dip in the temperature lately, I can pack up the ice cream machine and unpack the slow cooker. The first thing I decided to make was chicken Provencal, a fantastic recipe I adapted from the Cook's Illustrated cookbook.

Starting with the chicken, I am very pleased that boneless, skinless chicken thighs have percolated into my super market. They are stupendous and almost more flexible than chicken breasts. They also stew very well.
I discovered this recipe while searching for a good putanesca recipe. I'm not extremely versed in French cooking, but this preparation is actually pretty simple. You can mix and match certain parts (like more olives) to match your tastes.
Chicken Provencal (adapted from Cook's Illustrated)

8 boneless, skinless chicken thighs or 4 boneless, skinless chicken breasts
1 tablespoon vegetable oil
3 onions, chopped medium
14 cloves garlic, chopped
1 1/2 cups white wine
28-oz crushed tomatoes
1 3/4 cups low sodium chicken broth
1 teaspoon dried oregano (or 1 tablespoon fresh)
1 teaspoon dried thyme (or 1 tablespoon fresh)
2 bay leaves
2 tablespoons corn starch
4 oz. Kalamata olives, pitted and roughly chopped
1/4-1/2 cup chopped parsley
1 tablespoon grated lemon zest.

Heat 2 teaspoon of the oil in a 12-inch skillet over medium high heat until smoking. Season chicken thighs with salt and pepper and place in hot skillet. Brown on both sides, about 10 minutes, and transfer to slow cooker. If the pan is too crowded brown in batches. Add remaining teaspoon oil and onions and a bit of salt, cooking until the onions are wilted, about 5-8 minutes. Add the garlic and cook for another minute. Add wine, scraping up bits from the bottom of the pan, and cook until reduced by half, about 10 minutes. Add the onion mixture to the slow cooker, followed by the bay leaves, thyme, oregano, tomatoes, and 1 1/2 cups of the chicken stock. Cover and cook for about 4 hours or until the chicken is very tender.

Remove chicken from cooker and transfer to plate, covering with foil. Turn slow cooker to high, whisk remaining 1/4 cup chicken stock with cornstarch and add to the mix. Cover and cook until thickened, about 15-30 minutes. Stir in the olives, parsley, and lemon zest. Season to taste with salt and pepper. Serve sauce over chicken, passing additional sauce at the table.

Serve over rice, egg noodles, or soft polenta. Serves 6. Enjoy!

Read more...

Monday, October 19, 2009

The Great Chili Cook-Off- Part 1

My workplace decided this week to have a chili cook-off. We had a pie baking contest a few months ago and I was a judge, a fantastic honor that ended with a lot of good pie and a serious sugar rush. Thankfully our chili cook-off will include complementary Tums. Now, competition cooking is not something I usually do, mainly because as a home cook I still have a somewhat fragile ego (as I'm sure we all do when it comes to cooking new things). But the only way to grow is to try new things, right? I'm giving this a shot, hopefully with good results.

I have been making a white chili since before I started this blog, and I'm pretty proud of it. I'm going to put it up against the others in hopes of actually placing, which is hard since most people prefer a traditional red chili. My biggest problem though is my love of spice. I eat fiery food. I used to eat habanero salsa when I worked a Mexican restaurant, if that says anything. Needless to say, a lot of people do not really share my "slow burn on the lips" philosophy. Which just means I get to make test batches.

The first batch was made pretty much following my original recipe. I swapped out fresh tomatillos for the canned ones (I found a great local Mexican market for them) as well as added a fresh jalapeno. However, WHY ARE THERE NO FRESH GREEN CHILES? I know, I know, I'm spoiled growing up in the Southwest. But I recently watched a travel show talking about how the Hatch chile supply is decreasing due to lack of sales. I guarantee if they put some fresh ones next to the poblanos in the store this would help the problem. In fact, they can replace the poblanos if that makes it better. With the surge of Mexican food going on in the States, it makes sense to stock something that is very unique to us. But back to the chili.

I brought my batch into work for some taste testing on calm and unbiased tongues. Mostly positive reviews, though some thought it was a bit thick and maybe the fresh tomatillos were a bit tart. It does need a bit of tweaking, so I think I'm going to make another batch next week. I'm a bachelor this weekend, so I'm thinking a nice pumpkin beer and a pot of chili will make this horrible Indiana weather a bit more bearable.

What about the food world out there, do you make white chili?

I apologize for no pictures with this post. The camera is in California at the moment :)

White Chili

2 tablespoons olive oil
1 pound ground turkey (at least 90/10, I like 95/5)
1 onion, diced fine
4 cloves garlic, diced
2 chipotle peppers in their adobo sauce, diced
2 4 oz. cans diced green chiles
1 10oz can green enchilada sauce
1 pound fresh tomatillos, husks and stems removed
1 jalapeno
1/4 cup cilantro
1 teaspoon sugar
1 cup dry pearled barley
32oz . cans chicken stock
1 15oz. can cannellini bean beans, rinsed
1/2 tablespoon cumin
1 tablespoon chili powder (go for the Ancho kind, its smokey)
Salt
Pepper
1 tablespoon cornmeal
1 tablespoon tomato paste
Sour cream

Heat broiler to high. Arrange tomatillos (stem side down) on a foil lined baking sheet along with jalapeno. Place in middle of oven, roast for 5 minutes or until slightly charred. Flip and continue to roast until charred on other side. Remove from oven can cool slightly. Peel and seed jalapeno, remove stem part from tomatillo. Place tomatillos, jalapeno, cilantro, sugar, green enchilada sauce, and some salt in pepper in a food processor. Pulse until mostly smooth.

Heat about olive oil over medium heat in a large pot. Add onion and cook until slightly wilted, about 3-5 minutes. Add garlic and cook one minute longer. Add turkey, breaking it apart and cooking until it has lost its pink color. Add the chipotles, cumin, chili powder, and some salt and pepper. Stir and cook for about 1 minute. Add the tomatillo mixture and pearled barley, followed by chicken stock. Stir, bring to a boil and lower heat to a simmer. Cover and simmer for about 30 minutes. Add beans and cook 10 more minutes, or until barley becomes only slightly chewy. Remove lid, stir in cornmeal and tomato paste, and cook for about 5 more minutes. Serve topped with a bit of sour cream.

Read more...

Wednesday, October 14, 2009

Gage

There are few places I enjoy more than a pub. Beer and I are on quite good terms, and I love the food that accompanies it. Thankfully, beer and food pairings are becoming more and more popular thanks to the emergence of good quality beer in the states (but that's another post). I recently ate lunch at Gage, a Chicago gastro-pub that offered a higher end spin on traditional brunch, lunch, and dinner pub fare.

Even at an off lunch hour, the place was downright packed. Not to mention the place is quite large (there is another bar in the basement that they open up for weekend nights). We sat in the bar (no wait), and were greeted with friendly and knowledgeable service. Gage runs specials every day including a fish, sandwich, soup, and entrée of the day. Em had fish and chips (made with the fish of the day, fresh cod) that probably rank as top 5 in best fried fish ever. Guinness batter and perfectly cooked, they were great. I had the sandwich of the day, roasted pork leg served with a cilantro aioli. Man was it good. Tender pork, a homemade sauce, and really good bread. I love pub food, and this hit the spot. The beer they have on tap is also quite nice, with a featured local beer on tap for each season. Nice.

The best part might have come with desert. Deconstructed coffee and doughnuts are something you do not usually see. Well, ok, I have never seen. A fresh drop doughnut rolled cinnamon sugar, a fried chocolate gonache (which was unsweetened), and a sweet coffee sauce poured over the top. Yes, it tasted as good as it sounds. We both decided to go back the next time we were in Chicago, and maybe even twice.

http://www.thegagechicago.com/

Read more...

Friday, October 9, 2009

Making Banana Pancakes on the Weekend


The first time I heard of banana pancakes was from a Jack Johnson song. But he only makes them when he wants to pretends it’s the weekend. What about when it's really the weekend? Well, I decided to break the mold and make them last week. I am now a true believer of the putting the banana in the pancake.

The main problem I found was how to add them to not just get the banana flavor but also get some contrasting textures. Most banana pancake recipes I found incorporated banana into the batter by mashing, but that was it. Flavor is great, but only mashed banana and I don't really see eye to eye. I think it's my aversion to banana flavoring. When I worked at a bakery we had this glop called Fruit-O that we added to our banana nut bagels. They tasted alright, but that stuff made my stomach churn it smelled so strange. Not exactly a great food memory, which has in the past caused me to shy away from flavoring anything with banana (and don't even get me started on orange cake).

Turns out by adding banana two ways I was able to get the perfect combination of flavor and texture in my pancakes. I mashed up one banana to put in the batter, but I also sliced a few and placed them on the top of the pancake, pushing it in to the batter. When flipped, the bananas caramelized on the bottom. Em gave it two thumbs up.

The only better thing than a banana pancake is a leftover one smeared with peanut butter, rolled up, and consumed quickly. I don’t know why I did not think of that earlier, I feel like I was really missing out. I think I might just throw peanut butter in the batter next time.

Banana Pancakes

1 cup flour
1 teaspoon baking powder
1/2 teaspoon baking soda
1/2 teaspoon salt
½ teaspoon cinnamon
2 tablespoons sugar
½ teaspoon vanilla
1 egg
2 tablespoons butter, melted and cooled slightly
1 cup buttermilk
1 banana, mashed
2 bananas, sliced thin

Combine flour, baking powder, baking soda, sugar, salt, and cinnamon in a large bowl. Stir until combined. In a separate bowl combine the egg, buttermilk, vanilla, mashed banana, and butter. Slowly add the wet to the dry and fold using a spatula. Once most of the batter is combined and a few lumps remain, set bowl aside and let rest for 5-10 minutes. If the batter is too thick, add a bit more buttermilk. Batter should be slightly thin but not pourable.

Preheat your griddle or pan to medium-high. Spray with a small amount of cooking spray or butter. Using a scoop or ladle, add small amount of batter to pan. Place sliced bananas in a single layer on the top of each pancake. Cook for 3-4 minutes until bottoms are browned. Flip pancakes over and continue to cook until bottom is browned and pancake is firm, about 2 more minutes. Serve with syrup.


Note- this recipe feeds 2-3 people, so if you have a larger family, you should probably double it.

Read more...

Monday, October 5, 2009

Barbecued Redemption


As much as I love to grill, barbecue has not always been a strong point for me. Notice that barbecue and grilled are used in two separate contexts, as they are NOT the same thing (if you tell a barbecue person they are the same, prepare to be punched). Barbecue is more about the low and slow, something I have had a hard time getting my head around due to my lack of patience. This is especially true when it comes to ribs. I have made ribs three times in my life. The first, I was 14 or 15 and had no business being near a rack of pork. The second was a few summers ago, when I made them in the oven using an Alton Brown recipe. They were ok, but the whole house smelled for days and they were a bit sweet for anyone's taste. This is my third attempt. I often turn to Cook's Illustrated for some inspiration of cooking methods and flavor bases. We do not always see eye to eye on the simplicity of applications, but for the most part they can guide me in the right direction with all of their research and testing. Being a scientist myself, I truly respect what they do. In fact, I would work for them in a heartbeat, something of a dream job for me by combining the two things I love the most. But I am getting off topic, this is about ribs. If you want to make truly good ribs, you need to give yourself an afternoon to make them. Again, low and slow. The directions that follow mainly detail a gas grill. If you have a charcoal or wood grill, I put a little blurb at the end to cover it.

Barbecued Ribs (adapted from Cook's Illustrated)

2 full racks pork ribs (spare or baby back), about 2-3 pounds each
1/4 cup chili powder
1 teaspoon garlic powder
4 teaspoons salt
1 tablespoon pepper
1 teaspoon cayenne
2 cups wood chips
Barbecue sauce (I cheated and used bottled from a rib festival)

Combine chili powder, garlic powder, salt, pepper, and cayenne in a small bowl. Rub a copious amount onto the ribs on all sides. Wrap the ribs tightly in plastic wrap and place in refrigerator for at least one hour or up to overnight. Let come to room temperature before placing on grill.

Soak woodchips in water for 30-45 minutes. Drain and place in a disposable aluminum pan (like a cake pan). Remove one of your grill grates and place the pan directly on the bottom of the grill, placed on top of the primary burner (a lot of grills have those V shaped bars above the burners, that's what I'm talking about, on top of those). Turn all burners to high and cover grill. Heat until the chips are smoking, 10-15 minutes. Turn all burners off except the primary burner, and adjust that to medium. Place ribs on the non-heated end of the grill and cover. The goal is to maintain an internal grill temperature of 275-300°F while keeping the ribs off of direct heat. Cook ribs, flipping and rotating about every 30 minutes, until the meat starts to pull away from the bone, about 3-4 hours. If desired, brush with sauce on both sides the last 15 minutes of cooking. Wrap tightly in aluminum foil and let rest for 30 minutes- 1 hour. Enjoy.

Note- For a charcoal grill, apply the same principal of a two side fire. Pile coals on one side of the grill and heat until ashed over. Place wood chips directly on the coals. Place ribs on the other (cooler) side of the grill and cover when grilling. Every hour add a few more briquettes to maintain heat.

Read more...

Tuesday, September 29, 2009

Spicy Beef


This recipe has special meaning, not for me, but for Em, as spicy beef was her first solid food. Yes, that's what her parents gave her. Screw carrots or bananas, they wanted their daughter to get a full on treatment of real food at an early age. Needless to say, while I do appreciate their efforts, I sometimes wish they would have fed her squash so she would like a little more.This recipe is an adaptation from John, who adapted it from the Chinese Takeout Cookbook, a treasure trove of dishes that he (and I) often use. It also makes a fantastic addition to fried rice as a leftover.
Spicy Beef

1 egg
2 tablespoons cornstarch
1/2 teaspoon salt
1 teaspoon peanut oil
1 pound flank steak thinly sliced across the grain then shredded. (It’s easier to slice the meat if it’s slightly frozen.)

1 teaspoon minced fresh ginger
1 teaspoon minced garlic

2 carrots and 2 celery ribs, cut into 2 inch julienne
Or 2 cups broccoli

For the sauce
1 tablespoon dry sherry
1 teaspoon sugar
2 tablespoons chili paste with garlic
1 tablespoon hoisin sauce
2 tablespoons soy sauce
2 tablespoons water

1 or 2 whole scallions, cut into 1 inch pieces
1 tablespoon sesame oil or hot sesame oil (optional)

Combine first four ingredients for marinade and mix until smooth. Add shredded beef and set aside for 30 minutes.  Combine sherry, sugar, chili paste, hoisin sauce, soy sauce and water for sauce.

To a heated wok add 1/2 cup peanut oil. When hot, add the beef and stir-fry about 2 minutes until it loses its pink color. Remove with slotted spoon and set aside. Pour off all but 2 tablespoons of oil. Add garlic and ginger, stir-fry 30 seconds. Add vegetables and stir-fry 2 minutes. Add sauce and scallions and stir. Return beef to wok and heat thoroughly, about 1 minute. Remove from heat and stir in sesame oil if desired. Serve immediately.

Read more...

Tuesday, September 22, 2009

Chicken Noodle Soup

I know I wrote about chicken noodle soup before, but it recently came up again when Emily came down with something awful (thankfully not H1N1). Few things elicit a response that soup brings from people, especially when ill. It still remains one of my fondest food-related memories, and I am more than happy to make a pot of soup in hopes that it will lift one's spirit.

As far as the soup goes, the application is simple enough. Cook chicken while making stock, shred chicken, drain stock, add vegetables and other wanted ingredients, and consume. There is much debate as to the actual stock making process, and I approach this one of two ways. The first is a more time consuming process, actually separating the breast meat, thighs, and drumsticks from the rest of the chicken. Use the remaining bones to make the stock. This allows you to have perfectly poached meat by adding the rest at a later time. Good fun, but it does take a lot longer. The second, more time-friendly approach is to just plop the whole chicken in and slowly extract flavor from the bones, making a stock and cooking the chicken all at once. Since I usually do not get a heads up on when someone is going to be sick, I prefer this way.

Variations are, of course, pretty much open to interpretation. I enjoy the classic application of a mirepoix along with some mixed veggies. But feel free to add whatever you like to this tasty concoction. In the end, it's all about hearty comfort.

Chicken Noodle Soup

1 whole chicken, 4-5 pounds
2 bay leaves
1 tablespoon peppercorns
4 sprigs thyme
4 sprigs fresh parsley
1 onion, quartered
1 carrot, chopped into 4 pieces
1 celery stalk, chopped into 4 pieces
2 garlic cloves, smashed
1 T olive oil
1 chicken bullion cube

3 carrots, large dice
2 celery stalks, large dice
1 large onion, large dice
3 cloves garlic, minced fine
1 16oz bag frozen mixed vegetables
3 tablespoons butter
1 16oz bag egg noodles
2 teaspoons fresh thyme, chopped (or 1 t dried)
Salt and pepper to taste

Heat a large pot with oil over medium high heat and add chicken, letting brown for about four minutes on each side. Add the single carrot, celery, garlic, and onion, as well as any trimmings from the other vegetables. Add water to cover by two inches. Place the bay leaves, peppercorns, and thyme sprigs in either a tea ball or a piece of cheesecloth wrapped in string. Add to the pot along with the bullion cube. Bring the water to a simmer and reduce heat to medium-low so it just continues to bubble. Cook until chicken is cooked through, about 1 and a half hours. If the water level drops below the chicken, add a bit more to cover (it helps if the water is warm).

Remove chicken from stock and transfer to a plate. Let cool for about 20 minutes before shredding chicken into bite sized chunks. Drain the stock into a large bowl and wipe pot clean.

Return pot to medium heat and add butter. Add carrot, celery, and onion, sauté for about 3 minutes until the onions just start to wilt. Add garlic, stir and cook for about 1 minute. Add the chicken to heat it through, and then add stock. You do not need to add all of the stock if you prefer a more chunky soup, just save the rest for a later application. Let the soup come to a boil and reduce heat to low so it just barely simmers. Cook for about 30 minutes or until veggies are tender.

Meanwhile, bring another large pot of water to a boil, salt it, and add your egg noodles. Boil them until still pretty al-dente (this helps prevent them from turning to mush later). Drain the noodles and rinse to stop the cooking. Add frozen veggies to the soup, return to a simmer, then add the noodles and thyme. Let cook for about 15 more minutes and then season with salt, pepper, and more thyme if you desire. This recipe makes a lot, but chicken noodle soup freezes quite well and keeps for about 3 months.

Read more...

Saturday, September 19, 2009

Coffee Cake Muffins

It's no secret that I love breakfast. If I ever open a restaurant, its going to serve breakfast. And that's it. Breakfast is probably my favorite time of the weekend, a time when I have some peace in the kitchen to just whip up something tasty. The dog lies at my feet, coffee brews, and life is wonderful. I don’t know if everyone else enjoys this time of the morning like I do, but it sure helps me recharge during the weekend.

One of my favorite things to do for breakfast is bake. Cinnamon rolls, biscuits, you name it, I do it. However, with the recent trend of us eating a bit more healthy, I have been banned from some of my normal concoctions. So I did what all (read: one) cooks do in this situation, I subscribed to Cooking Light. Of the healthy magazines, I find it probably the best at the moment (every other one seems obsessed with using at least one box o'junk in a recipe). I found their coffee cake which had some praises, and also some glaring flaws. I made them according to the recipe/rewrites the first time, and they were pretty darn good (I decided to make them into muffins). For a light muffin. But I wanted fireworks in your mouth good. So I adjusted the recipe to what I knew about muffins, keeping in mind that making light muffins is a delicate process, one false step and you either get bricks or saw dust. Not on the menu.

These muffins came out great, and I am happy to say they will join my regimen of normal breakfast baking. I also managed to make them slightly lighter than Cooking Light made them, bringing them in at 200 calories per muffin (batch makes 12).

Coffee Cake Muffins

1/4 cup packed brown sugar
2 teaspoons ground cinnamon
2/3 cup white sugar
1/4 cup butter, softened
2 egg whites
1 cup reduced-fat sour cream
1 teaspoon vanilla
1 3/4 cups flour
1 teaspoon baking powder
1 teaspoon baking soda
1/2 teaspoon salt
Cooking spray

Preheat oven to 350°F. Combine brown sugar and cinnamon in a small bowl; set aside.

Place white sugar and butter in a large bowl; beat with a mixer at medium speed until well-blended, about 5 minutes. Add egg whites, beating well after addition. Beat in the sour cream and vanilla. Combine the dry ingredients (flour, baking soda, baking powder, and salt) in a bowl, slowly add to mixer and beat well.

Lightly coat a 12-muffin tin with cooking spray. Spread half of batter evenly into each muffin tin. Sprinkle half of cinnamon streusel over batter. Spread remaining batter over the streusel. Top with remaining streusel.

Bake for 35 minutes or until a toothpick inserted in center comes out clean. let cool about 5 minutes before removing from tin. Enjoy!

Read more...

Monday, September 14, 2009

Spicy Corn Salsa (and I mean spicy)


Cooking is a process of trial and error. Sometimes your dish is great, and sometimes you try to return it from certain doom. When I worked in a bakery, we made a tomato/pizza soup. It was pretty straightforward except for the seasoning. I (and my coworkers) found it to be a little bland. Now, this is an instance of me not really having control of the situation, yet I managed to make it even worse. I went to season the soup with pepper and plop, the lid was not on and a bunch went right into the soup. Fishing out what I could, I still had an extremely peppery pizza soup that was not going to be served. So what did I do? Well, I could add salt because it would cause an entirely different problem. I instead took the idea from someone that sugar would counter it. Yes, certainly did, but I missed the fact that acidity would have countered the sugar. So the soup turned out sweet, peppery, and I still could not serve it.

Point is, repairing dishes is something that either works or fails miserably, but no matter, you have to try. I think what makes people hesitant to get in the kitchen is the possibility of failure. That should not deter you from trying things, learning, and growing as a cook. Some of the dishes I make go down in symbolic and literal flames. It just happens.

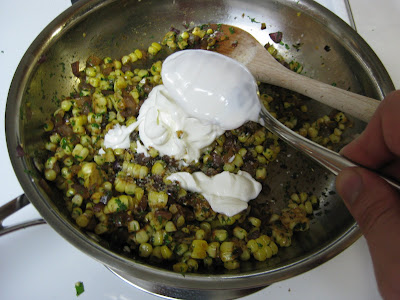
The other night during one of my leftover kicks, I decided to use the previous nights leftover grilled corn to make a salsa for the tacos I was making. I would go with black bean and corn, but I had no black beans. So, roasted jalapeno (got some from a friend), corn, and onion salsa. Warmed and served over tacos. I roasted and peeled my jalapenos, and then did what I normally do, I tasted one. It was not that hot, so I left the membrane in and chopped up two for the salsa. Heh. This stuff turned out great, but it threatened to burn a hole in my mouth after a few bites. I added some sour cream to it and loved it even more. But I might take out the membranes next time, just in case.

Spicy Corn Salsa

1 tablespoon butter
4 ears leftover grilled or boiled corn, kernels cut off cob (or 2 cups cooked corn kernels)
2 jalapenos, roasted, seeded, peeled, and diced
1 red onion, chopped
1 red pepper, roasted, peeled and chopped
1 garlic clove, minced
2 tablespoons cilantro
1 t lime juice
1/4 cup sour cream
1/2 teaspoon cumin
Salt and pepper

In a medium skillet over medium heat, add butter until foaming. Add onion and cook until just soft, about 3 minutes. Add garlic and cook for 30 seconds, followed by corn. Cook until corn is cooked through, about 2 minutes. Add jalapeno and red pepper, stirring frequently. Add lime juice, cumin, salt, and pepper to season. Turn off heat and add cilantro and sour cream. Serve as a side relish or over tacos. Enjoy.

Read more...

Tuesday, September 8, 2009

Risotto with Olives, Capers, and Oven Roasted Tomatoes

When I made my oven dried tomatoes, I all along had an idea to pair them with something salty. I have made puttanesca a few times with chicken or even tuna, but this was my first "deconstructed" attempt using some of the similar flavors. Ok, that sounds like I planned this huge meal weeks ahead. Actually, I looked into what I had in my fridge and used what was available.

I like to make things into risotto, it's such a good dish and once you make it a few times it's like riding a bike. I was petrified of it when I first made it, but after making it I found it to be fantastically simple and delicious. The other thing that really kicks it off in my household is how downright good it is for you. When something tastes like you made it with cream but offers very little in terms of fat, it goes over well. I paired it with some easy grilled chicken for a great meal.

Mediterranean Risotto

2 tablespoons butter
2 cups Aborio rice
½ cup white wine
4 cups chicken stock
4 cups water
1 onion, chopped fine
2 cloves garlic, minced or pressed
8 ounces kalamata olives, pitted and roughly chopped
2 tablespoons capers, drained
1 tablespoon lemon zest
1 tablespoon lemon juice
¼ cup parsley
½ teaspoon red pepper flake
¼ cup grated Parmesan cheese
Salt and pepper
Oven Roasted Tomatoes

Place the stock in a medium pot over medium heat to have it hot to add to the risotto. Heat butter over medium heat in a large heavy bottomed pot or Dutch oven. Add onion and cook until translucent, about 4-5 minutes. Add garlic and cook for 30 seconds. Add rice and coat with the butter, cooking the rice until lightly browned and the pot smells slightly nutty, about 5 minutes. Add the wine and stir until evaporated.

Add two ladles of hot stock into rice, stirring constantly. Let cook, stirring often, until most of the liquid has been absorbed. If the mixture is bubbling like crazy, turn the heat down a bit. When the liquid has been absorbed repeat with 1-2 ladles more of stock. Repeat this process until about 7 cups of the liquid has been used. Taste the risotto for doneness; it should be slightly al dente. If it's too crunchy, add another ladle of stock and repeat. When the risotto is still slightly crunchy and loose (remember, it will continue to thicken and cook after this), turn off the heat. Add the olives, capers, lemon zest, lemon juice, parsley, and red pepper flake and stir to combine. Add the cheese and stir until just melted. Taste the risotto and add salt and pepper to taste. Serve, topped with oven roasted tomatoes. Enjoy.

Read more...

Sunday, August 30, 2009

Oven Roasted Tomatoes

Even though it's over, I'm sure Bravo will re-air "Top Chef Masters" a million times between now and tomorrow. If you did not get a chance to watch it, I strongly recommend it. It's everything I loved about Top Chef without the drama and egos of young chefs. And I was so thrilled (spoiler alert) with the winner, not only because he cooks Mexican, but because he has a restaurant in Chicago. Alas, currently getting a reservation at a Rick Bayless restaurant is more difficult to do than the Red Sox actually winning their division (sigh). So I will wait patiently.

In the meantime, I got some great recipe ideas from the show. One was from Michael Chiarello, oven roasted tomatoes. I picked up some tomatoes at the farmer's market and thought this would be a great way to serve them. Not only were they delicious, but they made my house smell SO good! This is actually the topping to the dish in my next post, Risotto with olives and lemon. It's a great sweet contrast to add to pretty much anything, not to mention it's super simple.

Oven Roasted Tomatoes (adapted from Michael Chiarello)

2 pints heirloom cherry tomatoes cut in half
2 teaspoons kosher salt
1/4 cup balsamic vinegar
12 garlic cloves, sliced thin
1/2 cup basil leaves (optional)
Pinch crushed red pepper flakes

Combine gently in a bowl and spread cut on cookie sheet. Put in 275 degree oven and roast for 2 hours. Applications are endless.

Read more...

Tuesday, August 25, 2009

Pesto Madness

As shown by the picture above, my basil has gotten out of control. That's namely my fault because I have not used that much this summer (except for salads mostly). But I finally broke down and made pesto.
I have made pesto before a few times, and while I liked it, I was never in love with my recipe. The first time I followed a prep that was extremely oily. Next I thought there was too much garlic. I figured I should do some research before I attempt a third.
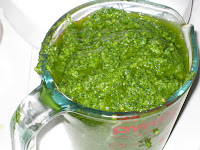
Whatever pesto recipe I look at, I tend to cut the oil in about half. I just think it’s a bit much, and it's much easier to add oil than it is to take it out. I mean, who has a centrifuge in their house? I don't (anymore). I also looked into the garlic in my recipe. I usually just peel a few cloves and add them into the pesto, but raw garlic has quite the bite. After some digging, I came across what Cook's Illustrated does, which is to toast the garlic cloves (in their skins) in a pan for a few minutes. This lessens the harshness of the garlic flavor and allows for a better texture. I also found I did not have enough pine nuts to make all the pesto I wanted, so I simply added some almonds to the mix and found that I really liked the nutty mixture.With my research done, I headed to the kitchen and proceeded to make about 4 cups of pesto. Yes, I had that much basil. The great thing about it is that pesto freezes really well, so I had it for dinner and then froze the rest for future applications. Pesto can be used in a variety of ways, but I think my favorite is simply tossed with pasta, sprinkled with Parmesan cheese, and topped with fresh tomatoes.


Basil Pesto Pasta with Tomatoes
For the Pesto-

~2 cups packed basil leaves, washed
1/3 cup extra-virgin olive oil
4 garlic cloves, unpeeled
1/4 cup pine nuts or almonds, toasted slightly
1/4 cup Parmesan cheese, grated
Salt
Pepper

In a skillet over medium heat (probably the same one you used to toast the nuts), add in the garlic cloves, unpeeled, and toast while moving often until a few brown spots appear on the skins, about 5 minutes. Cool the garlic cloves to room temperature and peel. Add the nuts to your food processor or blender and pulse for 3 seconds. Add the garlic, basil, Parmesan, half the oil, salt, and pepper and chop until smooth. With the pesto chopping, drizzle in the remaining oil. Season to taste. You can freeze the pesto by pressing some plastic wrap over top of it and sealing in an air-tight container for up to 6 months. Makes enough for 1 pound pasta.

For the dish-

~3/4 cup Pesto
1 pound pasta
1/2 pound cherry tomatoes, sliced in half
1/4 cup Parmesan cheese

Boil pasta until al dente, drain (reserving some of the water) and move to a large bowl. Immediately add the pesto and toss to combine. Add a bit of the pasta water to loosen the sauce. Serve, topping with some cheese and sliced tomatoes. Enjoy!

Read more...

Tuesday, August 18, 2009

100 Posts! and The Black Sparrow

Wow, 100 posts! When I first started writing this blog, it was mainly to have some place to put my thoughts and recipes down in a media that was shareable for all to see. Now it has evolved into more of my inspiration to try out new dishes and improve myself as a cook. I have some ideas as for the evolution of this project, and I hope they come to fruition before 200 posts. So thanks to all of you who have stuck with me. I hope you have enjoyed my writing and my recipes!

In light of my 100th post, I present to you not a recipe, but a restaurant experience of my favorite place to eat in Lafayette.

I went to The Black Sparrow for lunch the other day and was appalled that my coworkers who went had never been there. Really? Shoot, I must be slacking on talking up good places to eat in town. It's what I do! So without further ado, here are a few reasons you should go down the Black Sparrow pub for lunch, dinner, or a drink.

First, the atmosphere. The bar is located in downtown and is I believe a refurbished law office. Most of the décor is old 40's and 50's, giving the place a great feel. The bar is really no nonsense. A few meals, some drinks, that's all they do. They have bands on the weekends and have a non-smoking dining room until 10pm.

Next, the drinks. I am a huge fan of beer, and you can get nothing better than the selection at The Black Sparrow. Their theme is "no crap on tap". It's always different, it's always good, and everyone who works there knows all about the beers. I discovered a few of my all time favorites at this place. Their cocktails are also great. They do a lot of throwback cocktails, such as the dark n' stormy, or a New York Sour, made with egg whites. Match that with a great selection of pretty much whatever else you desire and no one should feel left out.

Last, the food. The menu is simple and refined. The vegetables are local, the meats are fresh, and the flavors are modern American meets international flare. Romesco sauce with goat cheese for an appetizer, or a BLTE (the E is a fried egg) with pesto mayo, and delicious pizzas are the highlight. I always try something new and I am never disappointed. Recently they have started dinner specials that showcase steaks or fresh fruits and vegetables.

Now that you have three great reasons to go here, why are you still reading?

Read more...

Thursday, August 13, 2009

Hot Potato

This is one of the secret weapons I have in my kitchen. And I owe it all to Emily's aunt Carol. She makes this fantastic roasted potatoes, which when I had them the first time they literally blew my mind. When I found out how easy they were to make, it blew my mind again (my mind has since recovered). I actually prefer these to regular baked potatoes (unless I am really in the mood for sour cream).

As far as potato variety goes, you can really use whatever you feel like. The last time I made them I used red potatoes, but russet or Yukon gold will work just as well. Just make sure you do not eat the bay leaf. It won't taste very good.

Bay Leaf Roasted Potatoes

6 potatoes, cut in half lengthwise
12 bay leaves
2 tablespoons olive oil
1 teaspoon kosher salt

Preheat oven to 375°F. In a glass baking dish, spread olive oil over bottom. Sprinkle half of the salt over the oil. Wash the potatoes, place a bay leaf on each cut side of a potato and place it cut-side down in the dish. Sprinkle remaining salt on top of potatoes. Cover with foil and bake for about 45 minutes or until potatoes are fork tender. Let rest for a few minutes before removing bay leaf and eating.

Read more...

Tuesday, August 11, 2009

Corn, Basil, and a Puppy

I usually put a picture of the dish I am writing about on top of my posts, but this time is a little different. How could I pass up putting a puppy at the top? This is the newest member to our home and kitchen, Molly, a 5 month Old English Sheepdog. She enjoys chewing her toys, eating way too fast, and sleeping on the kitchen floor when I cook. Who could ask for more? On to cooking, this dish is a result from one of the many times I am faced with leftovers. This time it was grilled corn as well as a red pepper I had in the fridge and decided to roast. I enjoy eating leftovers as is, but I have found creativity can really bring out a greater dish. Combined with some basil (more on the massive basil plant I have growing out back next week) I made a pretty simple salad and was quite happy with it.

This recipe calls for two minor "technique" cuts, if you want to call them that. The first is cutting the corn. I prefer to stand the cob up and cut straight down on all sides with a serrated knife. It gets most of the kernel and does not make a huge mess. For basil, I am employing a chiffonade. It's a fancy French word that sounds more complicated than it is. Stack your basil leaves in a nice pile, about 6 high, roll them into a bunch, and cut small strips of the roll. Boom, that's it. Grilled Corn and Basil Salad

3-4 ears sweet corn, kernels separated from cob
½ red onion, diced fine
1 red pepper, roasted and chopped
1 green pepper, chopped
½ cup basil, cut into ribbons.
2 tablespoons lemon juice or cider vinegar
2 tablespoons olive oil
½ teaspoon red pepper flake
Salt and pepper, to taste

Combine all ingredients except basil in a bowl. Mix to combine. Once mixed, add basil (this will prevent bruising). Chill for about 10 minutes, enjoy!

Read more...

Friday, August 7, 2009

Grilled Corn

Of all the things I enjoy during the summer, I cannot think of one single food I enjoy eating more than grilled corn on the cob. Last week I made it with steak teriyaki and consumed three ears with dinner. I average at least two per meal, it's that good. Everyone does it a bit differently. Some shuck the corn and parboil it, finishing it on the grill. I'm too lazy to want to do that, so I have started grilling mine, silk, husk, and all. It turns out that grilling corn this way allows for some easy husk removal and no leftover silk on the cob (I'm going to put those corn silk brush manufacturers out of business). So go down the street to your market or stand and get some fresh corn. It embodies summertime.

Grilled Corn

Corn, still in husk

Preheat grill to medium-high. Make sure to leave a space that has no coals or flame to avoid charring. Remove very outer layer of corn husk, mainly lose bits (see picture). With a knife, cut off the tip of the silk (you don’t need to this, but it will avoid it blackening or burning on the grill). Rinse off corn and place on grill. Cover and cook, turning often, for about 20 minutes. Outer husks should brown or blacken slightly. After 20 minutes, remove one ear and check for doneness by pulling back part of the husk and checking the tenderness of the corn (use tongs, it's hot). When corn is done, remove and let cool on sheet pan for about 5 minutes. Shuck corn and remove silk, it should fall off easily. Serve with salt, butter, or nothing. If you enjoy more char on your corn, return the peeled ears to the grill and cook an extra 3-5 minutes, turning often.

Read more...

Tuesday, August 4, 2009

Fiesta Mexican Grill

Once again it's time for the Search for Good Mexican Food in Lafayette (SFGMFIL). While I enjoy my meal every time I step into El Meson, occasionally I am simply looking for a quick burrito filled with whatever I desire. This leaves me a few choices, all within 2 blocks of each other. First, I have Chipotle, which is decent, but really suffers from the fact that they were once owned by McDonalds and therefore subject to the same quality standards as their gourmet burgers. Moving on. Qdoba is right up the street, and provides you with practically the same service, albeit with better rice and a few more menu options (Mexican gumbo is good). But again, it's owned by a burger chain (Jack in the Box) and sometimes the quality is really hit or miss. I also refuse to discuss Moe's, as the two times I have eaten there have resulted in dissatisfaction of both my mind and my stomach.

But wait, there is hope yet! Right across from my favorite sushi restaurant sits a newer establishment known as Fiesta Mexican Grill. To be honest, if I had not been eating sushi I never would have known about the place. They really need to advertise (then again, that's hopefully what I'm doing by writing about them). That place is really good. First, as I am usually pretty critical about Mexican food, they make their own tortillas, which immediately makes them worthwhile. Second, they serve burritos enchilada style. Coming from the southwest, this was something I find severely lacking in the area. Burritos are good, but smothering a burrito in enchilada sauce and baking it is even better.

The first time I went in, I tried the shredded chicken burrito, and I have since tried the shredded beef and grilled chicken. All are very good, but the grilled chicken is awesome. They give you a choice of sauce to put in and on your burrito (the medium green chile sauce is dynamite), and top it with whatever you want. Their pico de gallo is homemade and wonderfully spicy. Since I discovered this place I have not ventured back to any of the other burrito places. Why would I when I found something so great at Fiesta?

102 N. Chauncey, West Lafayette, 765-838-0988

Read more...

Thursday, July 30, 2009

Steak Teriyaki


Having my grill back has been wonderful. I cooked steak the other night and used the leftovers today for a very tasty steak sandwich.

This is a recipe I got from Em's dad, and there is not much to it. Marinate, grill, slice, and consume. You cannot go wrong. I do recommend you use good soy sauce for this recipe as it is the main component in the marinade. I use flank steak because it's darn tasty, lean, and is a great grilling steak. Being slightly lean helps avoid any flare ups and helps aid in slicing the meat extremely thin for serving. To avoid the meat sticking to the grill I lightly oil a paper towel and wipe down the grill grates after preheating.


A few things I have learned from grilling. First, get a thermometer. It's one of the most useful tools you can imagine when grilling. Second, avoid flipping meats over and over, you will only be disrupting cooking time and letting juices out. Last, if the meat is not cooking to your desired temperature but the bottom is starting to char, move it to a cold part of the grill. I usually have a direct and indirect heat section on my grill, and it truly helps avoid disaster.

Steak Teriyaki

½ cup soy sauce
½ cup sugar (white or brown)
6 garlic cloves, chopped
1 tablespoon fresh ginger, chopped
¼ cup olive oil
2 pounds flank steak

Combine ingredients for marinade and place in large zip-top baggie with steak. If the steak is two large cut with the grain into two pieces. Marinate overnight (you need to give it at least 12 hours).
Preheat your grill. Scrape down grates and grease slightly with a paper towel and canola oil. Remove steak from bag, letting excess marinade drip off, and place on grill. Cover and grill for about 8 minutes or until bottom side has nice grill marks. Flip steak and continue cooking until done, 125°F for medium rare (135°F for medium), about 8-10 more minutes. Remove from grill, let rest for 5 minutes, and slice thinly against the grain. Enjoy!


Read more...

Monday, July 27, 2009

The Return of the Grill


After 5 long months, my grill has returned. I was forced to relinquish it for a time due to the constraints and "rules" of apartment living. But that is past and now I can thankfully put large quantities of meats and vegetables over an open flame.

I currently have a gas grill, which I enjoy because of its ease of use and enormous surface area. I have cooked on all types of grills (gas, charcoal, and wood), and though I do miss grilling over mesquite, I realize that any of the three will lead you to a good meal. The first thing that went on the grill was chicken. I love grilled chicken, but it can easily taste and feel like rubber. I turn to my friends at Cook's Illustrated for some tips with this, and now grill all of my poultry this way. Not only does it lead to great flavor, but it helps keep the meat moist and avoid most flare-ups.


This recipe uses a similar sauce and marinade, mostly because reusing marinade is NOT safe. I prep the two side by side, cutting down considerably on time.

Lemon-Garlic Grilled Chicken

Marinade
5 tablespoons lemon juice (about 1 lemon)
4 cloves garlic, minced
1 teaspoon sugar
½ teaspoon pepper
2 teaspoons salt
2 tablespoons olive oil
2 pounds boneless, skinless chicken breasts

Sauce
3 tablespoons lemon juice (about ½ lemon)
1 tablespoon parsley, chopped
1 teaspoon Dijon mustard
2 tablespoon olive oil
½ teaspoon salt
½ teaspoon sugar
½ teaspoon pepper

In a small bowl, combine ingredients for marinade. If chicken breasts are thick, pound to about 1 inch thickness. Place marinade and chicken in zip-top baggie, combine, and let marinade for about 1 hour. Combine ingredients for sauce in a small bowl and set aside.

If using gas, turn on 2 of the three burners (or just leave about 1/3 of your grill without direct heat) to high (you will want to reduce the heat of the burners to medium-high when you place the chicken on the grill). If using charcoal, place your coals on one side of the grill and heat until ashed over. Remove chicken from marinade and place on hot side of grill. Cover and cook for about 3-4 minutes or until the chicken gets browned on one side. Flip chicken over sear on grill for about 1 minute more. Move to side of grill with no direct heat. Cover and cook until interior of chicken registers about 160°F on a thermometer, about 10 minutes. Chicken should spring back and not be mushy when you poke it with a finger. Remove from grill, let rest for about 5 minutes, and cut into slices. Serve with sauce over top or to dip in. Enjoy!

Read more...

Tuesday, July 21, 2009

North Shore Seafoods


I cannot believe I am talking about fish in Lafayette, Indiana. If it's not shrimp, I will admit, I am usually a fish snob. Why? Unless you find some from Chicago (which D&R gets sometimes), most seafood sold around here is farm raised, overpriced, and borderline gross. Scoff at me all you want, but even I have standards. But it also puts me at somewhat of a disadvantage because cooking fish is my weak spot due to my lack of experience with it.

Enter this precarious new shop on 4th street, North Shore Seafoods. A few weeks ago while perusing the farmer's market, I smelled salmon cooking. And it certainly smelled good. I investigated and found a small booth cooking up fresh, wild salmon. And it was good! I mean, really good. I got some more information from the shop and found out how they operate. They only sell more sturdy fishes, such as salmon, tuna, swordfish, and halibut. The reason for this is because all of the fish they sell is frozen. Not bagged and frozen but rather Individually Quick Frozen (IQF), this is done on the boat and is becoming more and more common in seafood operations. This process freezes fish as well as sealing it, preventing ice crystals and cell destruction. Chefs and cooks across the globe are big fans of this if local and fresh are not available. North Shore is also able to keep their prices pretty low (actually lower than the grocery store) because the fish has a longer shelf life in the freezer than the slimy case.

I bought some salmon for dinner to accompany the vegetable risotto I was making for dinner. I, at the recommendation of the proprietor, baked the fish frozen. I have heard of this before and figured it was worth a shot. I baked it at 350°F for about 30 minutes until the salmon reached an internal temperature of 130°F. Well, the results were alright. The middle was quite delicious, but the outside was a tad overdone by the time the fish cooked on the inside. Not a huge deal, but I will thaw the fish next time I cook it and experiment some with the cooking methods (for another post). The quality, however, was very good. The fish was firm and had a great flavor. At least I know that I have a local source of high quality fish any time I like. That's something I take great comfort in. Now if I could only find a good source for lobster…..

Read more...

Thursday, July 16, 2009

Stuffed Chicken

I currently reside in an apartment (for about another day, yay!) so I am limited with the amount of green I am able to grow. My current large garden consists of two tomato plants in pots and a small herb box. I know, high society there. I just have to comment, one of my tomato plants is a giant. The thing is totally massive, if it was a kid at school, it would be the 7 foot center of the basketball team. I have NO idea what I did to it.

My herb box was planted for budget reasons, mainly because grocery stores like to charge crazy amounts of money for herbs that are extremely perishable. No thank you. So I currently grow chives, basil, thyme, and oregano. I did parsley last year which was also nice, but I have since found a good source for it. However, sometimes the box likes to do its own thing, such as grow crazy amounts of basil. Pesto is always an option, but since I'm moving next week I am trying to avoid making containers of things. Instead I opted for a stuffed chicken breast.


The idea of stuffed chicken breasts (French style) I got from Cook's Illustrated, with their neat approach to using pieces of the chicken for the stuffing instead of bread, adding to the texture but not drying the whole roll out. Swap out some ingredients for what I have on hand; make the preparation a bit easier for time, and boom, dinner. I paired it with some really awesome fresh tomatoes and green beans that I just drizzled with balsamic vinegar and some salt, pepper, and sugar.

Stuffed Chicken Breasts

2 pounds boneless skinless chicken breasts (3-4 breasts depending on where you get them)
1 shallot, chopped
2 garlic cloves, chopped
½ cup white wine
½ cup basil leaves
4 ounces mozzarella cheese, shredded
½ tablespoon + 1 ½ tablespoons vegetable oil
1 cup chicken broth
1 tablespoon butter
1 teaspoon lemon juice or white wine vinegar
Salt and pepper

If the chicken breasts have tenders (the loose piece on the back the size of your finger), cut it off and reserve for the stuffing. Using a very sharp knife, butterfly the chicken breasts. Open up the breast so it is flat on the counter (still one piece), cover with plastic wrap, and pound to about ¼ inch thickness. It should be slightly larger than 6"x8". Trim the outside to make a 6"x8" rectangle, and add the trimmings to bowl of your food processor. You should get about 2 ounces of trimmed meat from each breast. Repeat with the other breasts and then set aside.

In the bowl of your food processor chop all of the breast trimmings in pulses, about 10 seconds. Transfer to bowl. Over medium heat place a large skillet and ½ tablespoon vegetable oil. Add the garlic and shallot and cook until soft. Transfer to the food processor. Return pan to heat and add wine, scraping up any stuck bits. Reduce wine to about 2 tablespoons and pour into a small bowl. Set aside.

To the food processor with the shallot and garlic, add the basil leaves and salt and pepper. Process to chop the basil. Add to the bowl with chicken and mix to combine. Next, lay out the chicken breasts. Spread the filling even over all of the breasts, leaving about ½ inch room on one long end of the breast. Sprinkle the cheese evenly over the breasts. Using the long side, roll the chicken into a tight roll, using the side without filling as somewhat of a seal. Tie each breast with 3-4 pieces of kitchen twine.

Heat the remaining oil in the skillet over medium-high heat until shimmering. Add the rolled breasts and brown on all four sides, about 2 minutes per side. Make sure to redistribute the oil in the pan to prevent sticking. When browned, add the chicken broth to the pan and cover, reducing heat to medium and cooking until the middle reads 160°F, about 10 minutes. Remove chicken breasts and cover to rest. Return pan to heat and add the remaining wine. Reduce the sauce to about ¼- ½ cup. Turn off heat and whisk in butter and lemon juice. Slice chicken breasts and serve sauce over top. Enjoy.

Read more...

  © Blogger templates The Professional Template by Ourblogtemplates.com 2008

Back to TOP